Tuesday, May 31, 2011

How to Photograph a Thunderstorm

Storms and lightning create beautiful opportunities for photography. The bolts of light are powerful and will make any scene dramatic but only if you can capture them.
To capture lightning you have to behave like a hunter, shooting and shooting until something is caught, focus and expose for the landscape you are using shooting 20 or 30 seconds exposures depending on the level of brightness in your scene. Something like ISO400, F11 and 20 seconds is a good way to start and you can adjust the parameters after taking a couple of sample shots before the hunt begins. Check focus carefully, it’s difficult to focus at night and out of focus bolts are not nice at all.
Use a remote intervalometer and program it to take dozens, even hundreds of shots one after the other. While the camera is taking the shots you can take a nice cup of coffee while you are warm and dry. You can also buy a specialized device as the Lightning Trigger to make the camera shoot only when lightning is detected.
Once the storm is finished examine the photographs looking for the best bolts and then create a composite scene merging all the nice shots in one. Load the shots in your photo editor as layers and play with different blending modes to find the best mode for your final image. Luminosity mode works quite well in several cases, other modes can be even better so always try them.
Lightning storms are fast, our brain usually remembers a mix of all the bolts and lights that we saw, that’s why a single photograph usually seems to do no justice to what we remember. The composite shot is usually more dramatic and even more similar to what we remember. Sometimes reality is the sum of events.

Monday, May 30, 2011

Photographing Waterfalls

Waterfalls and streams are popular photography subjects because they can easily be made into a soothing digital desktop wallpaper. A common element in many waterfall pictures is the silky smooth appearance of the water. This is not difficult to capture, with the right tools and techniques.

Tripod
Without a tripod, the pictures below would not have been possible. This is because we typically use shutter speeds of 2 seconds or more, which is not possible to hand-hold without getting camera shake.
Polarizing Filter or ND Filter
Circular polarizing filters are designed to reduce reflections and increase saturation. As a side effect, they also cut down about 1.5 stops of light coming through the lens.

ND filters are neutral density filters, available in different strengths. They act like sunglasses for your lens by cutting down the light coming into the lens.


Timing and Location

UluYamStream 2 Photographing Waterfalls
Finally it’s time to use these tools to get the shot. Shooting a time when the sun is not too strong will give you the best chance of slowing down the shutter speed. This is because even at ISO100 and F22, your shutter speed may not reach the required levels if there is too much light. A shutter speed range of 2 seconds to 5 seconds is your target. Shooting in forest cover will also increase the possibility of lower light levels.

Vary your shutter speeds for different moods. There are many other variables to fine-tune, like composition, color balance and foreground interest. So keep on experimenting to get the perfect waterfall shot.

UluYam TreeTrunk Sunset Photographing WaterfallsSmoothening Ripples

You can also apply this technique on other water surfaces, like lakes and dams. Ripples on a lake can be smoothened out by using a long exposure. The result is a mirror-like calmness. Reflections on this surface are sometimes rendered as wavy surreal reflections. This was exactly the technique used for the 2 images below.


Sunday, May 29, 2011

Optical vs Digital Zoom


On consumer digital cameras, the terms optical zoom and digital zoom are common. When shopping for a digital camera, ignore the digital zoom. What you should look for is the optical zoom capability, because what is captured using optical zoom is what the lens actually sees.
Digital zoom is basically using in-camera software to enlarge the center pixels in the photo, resulting in loss of detail and sharpness.

Some digital cameras use digital zoom exclusively, because they lack an optical zoom lens. On such cameras, the photo will be at its sharpest without using the digital zoom at all.
Other digital cameras have a combination of optical and digital zoom. On such cameras, I would turn off digital zoom entirely, and use only the optical zoom. This will ensure that I get sharp photos all the time.


x 1 x 2 x 3
Optical
Zoom
zoomx1 35mm Optical vs Digital Zoom zoomx2 70mm Optical vs Digital Zoom zoomx3 105mm Optical vs Digital Zoom
Usually equivalent to a 35mm lens. Details in the photo are captured by the lens. Usually equivalent to a 70mm lens. Details in the photo are captured by the lens. Usually equivalent to a 105mm lens. Details in the photo are captured by the lens.
Digital
Zoom
zoomx1 35mm Optical vs Digital Zoom zoomx2 digital Optical vs Digital Zoom zoomx3 digital Optical vs Digital Zoom
Usually equivalent to a 35mm lens. Details in the photo are captured by the lens. Camera adds pixels to make the photo larger. Details in the photo are artifically added via software in the camera. Camera adds pixels to make the photo larger. Details in the
photo are artifically addedvia software in the camera.

Friday, May 27, 2011

Night Photography Tips

Photography at night can yield amazing results if done right, but it is also a major hurdle for beginners in photography. Instead of blaming the equipment, let’s look at refining our technique. In this article I will suggest a few settings for night photography.


Fireworks Photography

The fireworks picture below was taken with a technique involving holding a black card in front of an open shutter. In manual exposure mode, set the shutter speed to 20-30 seconds (or use bulb mode), an aperture of F11 to F16 and an ISO setting of 100 or 200. Using the bulb mode on your DSLR, you can get the shutter to stay open as long as required. If you are using the bulb mode, a remote shutter release is very useful to avoid getting camera shake (yes it can happen even on a sturdy tripod). 

Timing is Crucial
The single most important tip I can give you regarding night photography is to get a good tripod. With a sturdy tripod, you can use the most basic camera and lens and come out with a winning shot. Armed with a tripod, the next thing to do is to scout for a good location where you can set up your tripod and wait for the twilight hour when the amount of ambient light matches the amount of artificial light. This creates pictures where the sky is a deep blue color, perfect for offsetting the man-made lights in the scene. If you are shooting a low ISO setting like 100 at this time, and your aperture in the F11-F16 range, your shutter speed will drop to a level where it is not possible to hold your camera steady. That is why you need a tripod.
Shooting Light Trails
Use a small aperture (which means a big F-number like F16) to get starburst effects on street lamps like in the picture below, taken in Ubud, Bali. Not only does a small aperture give you more depth-of-field (which means objects are sharp from front to back), it also enables you to get longer shutter speeds, which contribute to the long red lines created by the tail-lights of passing motorists. Or white lines created by their headlights. The easiest mode to shoot this is Aperture Priority.


Over Two Hundred!

I just noticed I had reached a new milestone. 200 frickin' followers!

I just want to tell you that you're all wonderful and I'm really thankful for each and every one of you!
Thanks for comment and visit me day by day.

This blog has grow very fast, I'll try and keep it updated more often from now on.
I hope all of you, enjoy the content!

Thanks again.

200 is an even number.
200 has 2 representations as a sum of 2 squares: 200 = 2^2+14^2 = 10^2+10^2
200 has the representation 200 = 2^8-56.
200 divides 49^2-1.

Thursday, May 26, 2011

Tips and Tricks for Sunset Photography


sunset photo tips
"Shining Through"(Click for Morel)
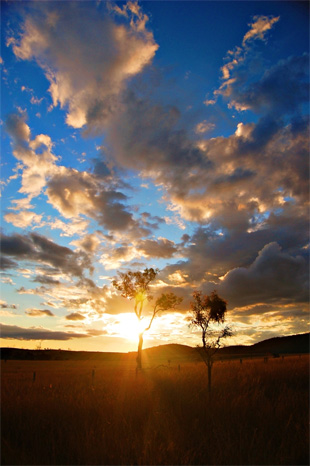
I personally prefer to shoot sunsets where the sun is hiding behind clouds.
Choosing the Right Day
In Malaysia, the best day for photographing a sunset or sunrise is a day when it is unbearably hot. This is because the sky is so clear that it is almost cloudless, therefore the sun’s heat rays are at their maximum intensity. So the next time you feel that the temperature is shooting up, pack your tripod and head for your favourite photography location!
The Right White Balance
A good starting point for your white balance setting would be Daylight/Sunny. This is to preserve any blue colour in left in the sky. Using a warmer white balance setting such as Cloudy or Shade may kill the blues. If there is no blue left in the sky, my advice is to go warm, which is to choose either Cloudy or Shade, in order to maximise the intensity of the orange/yellow colour.
Panoramic Vistas
You can take about 4 to 5 shots of a sunset panorama and then stitch them together in Adobe Photoshop. When taking panoramas, it helps to use Manual exposure mode, and manual focusing so that your focus point does not change from shot to shot. Using a telephoto lens rather than a wide angle lens also helps to minimise distortion, so that it is easier to do the stitching later.
sunset photography
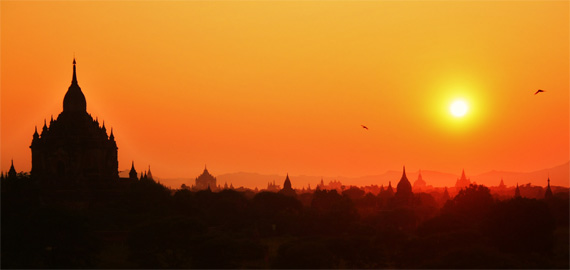
"Sunset over the temples of Bagan, Burma"  by Andy Cheek (Click for More)

Beach Photography Tips

beach photography tips
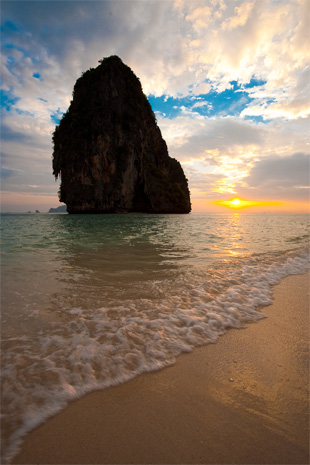
  "Mountain" by DailyPhotos (Click for More)  
One of the most photographed scenes in the world is the beach scene. The reason is that:
  1. The locale is beautiful by nature,
  2. People are usually relaxed and having fun and are not “stiff”
  3. A combination of the first two reasons.
This means that beach photography can be either landscape or portrait photography or a combination of both.

Unlike most other forms of photography, beach photography is about movement. The water is always in motion and if this plays a major part in the composition, you have to be able to balance this movement with the stillness of the rest of the image. The best way to do this is to keep the amount of motion in mind. If there is crashing surf, you will be best served by limiting the amount of surf in your composition or it may overshadow the non moving parts. The less the water movement, the more of it you can include in your compositions.


In beach photography, light is not always your best friend. We are accustomed to seeing bright sunlight in beach photos. But remember that if there is white sand, it can cause a lot of glare and result in stark high contrast photos that do not capture the feel of the beach.

When photographing objects or people on the beach, remember that you have a long flat unending background.

beach silhouette photo
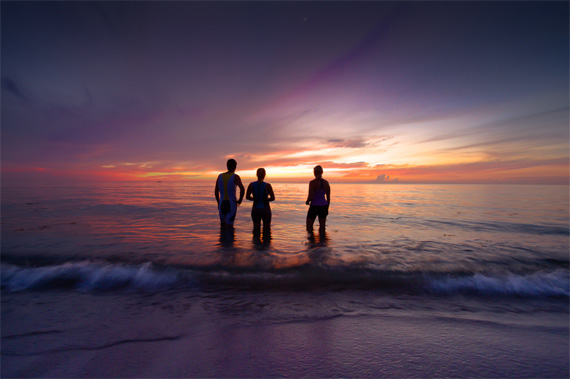
  "Waiting" by Debra Vanderlaan (Click Image for more)  
If you are trying to capture just the openness of the beach, use a wide angle lens. The small lens will exaggerate the perspective and result in the background seeming to stretch away into the distance and thereby add a 3 dimensional effect to your photo. If you are shooting up the beach, the wide angle lens will let you keep everything, from the water in front of you to the rocky headland in the distance, in focus.

Wednesday, May 25, 2011

Reasons Your Photos Suck

If you’re trying to improve your photography, then it helps to know where you’re going wrong. This article is all about pointing out where you’re going wrong and what you should be doing to fix it. It’s not easy taking consistently good photos, but once you’ve gotten the hang of it, it becomes incredibly rewarding.

1 – Bad Lighting

All too often photos are taken on compact cameras and digital SLR’s where the lighting isn’t adequate. The lighting is the most key part of taking a good photo, I know it sounds simple, but a photo is a collection of light, so has to be good. Pop up flashes can cast a very harsh light over your subject; flattening the image. Off camera flashes that can be rotated to point to a wall, or a ceiling have the ability create much more natural light. They also cast shadows over the subject, where shadows would usually be which gives them a lot more depth and make the whole photo look more natural.

2 –Too Much Photoshop

I’m all for a bit of post processing, but when it’s over done and on every photo, it looks pretty terrible. Try to get the exposure right in the camera and restrict post production to cropping, contrast and enhancing techniques. Purposely overexposing a photo, adding fake lens flare, going black and white for no reason, and too much contract will detract from what could be a very good photo.


3 – You’re trying to impress Others

Shoot what you like, not what you think others will like, or you’ll never be happy. You know what looks good and that means that you have a realistic target that you can picture in your head. That’s much more obtainable than what you think the masses will enjoy and at the end of the day, you’ll be happy with the results. If you see other photos that you love, take inspiration from it, stop trying to replicate it.

Everyday Life Photographs

Everyday Life Photographs

Education


Everyday life has so many things and works in it and if we are going to capture the everyday routine I am sure you will find so many beautiful moments.

In this post I collected beautiful and amazing everyday life photographs for your inspiration.


(I don't own the copyrights© of all the photos, if you wanna know the source click on it!)
Enjoy!


Tuesday, May 24, 2011

Understanding ISO (Part. I)

Why You Should Know What ISO Means

ISO is one of three factors which determine the exposure of a photo, along with aperture and shutter speed. To really get the most out of your photos you need to know what all 3 do and how you can use them. Read this post to gain a more in depth knowledge of how to use your camera properly and start taking expert photos.


Section 1 – What exactly is ISO?
The ISO (international Standards Organization) determines the sensitivity of the sensor in your camera, which in turn affects the exposure of your photos. The ISO scale typically starts at 100, and continues to double from this point to the boundary of your camera’s capabilities: 100, 200, 400, 800, 1600… The starting and ending points of this range and how well the camera handles the ISO depends solely on the camera that you’re using. Most modern cameras these days have many more points at which you can set the ISO in between those that i’ve mentioned.

The international Standards Organization are those responsible for setting this widely used standard and all you need to know is included in the information below.


Section 2 – How does ISO affect Exposure?


ISO is one of three factors which determine the exposure of a photo, along with aperture and shutter speed. These two affect the lens and exposure time respectively, with the ISO affecting the sensor (or film). To be more specific, the ISO determines how well exposed a photo will be by changing the sensitivity.
The ISO scale is similar to shutter speed in the sense that, when doubled, the exposure is also doubled; they are proportional to one another e.g. a low ISO number would give a low exposure and a high ISO would give a high exposure; much simpler then aperture.

Monday, May 23, 2011

Tips for Shooting Extremely Wide Angles (III)

And the last of the "Tips for Shooting Extremely Wide Angles" series is here!

Bridge Over Still Water, by Andreas Manessinger
Photo by Andreas Manessinger [©] 

PLAY WITH GEOMETRY

Capturing shapes and geometry with wide angles forces you to look at the world a bit differently. Look for large structures containing strong lines or curves, and move around until you find those shapes.


A cow, by Dave Wild
Photo by Dave Wild [CC by-n

TAKE A PORTRAIT

Wide angle lenses can be used to take portraits, if you’re mindful of the distortions caused by the lens. If you shoot around 30mm (or 20mm for 1.5x crop sensors) and keep your subject near center, the distortion will usually be minimal. On the other hand, you can use very wide angles and get up close to produce a distorted portrait on purpose.

Tips for Shooting Extremely Wide Angles (II)


GO VERTICAL
Shooting in a portrait orientation with a wide angle lens can produce wonderful images, even landscapes (which are more commonly shot using landscape orientation). Going vertical allows you to pack a lot of information into the frame, basically from your feet to way up in the sky.


The Barn and the Sky, by Brian Auer


SHOOT FOR THE SKY
If you have some nice cloud formations, don’t forget to point that lens up at the sky. The wide angle can pull in a huge portion of the sky and make for a great scene.

Sunday, May 22, 2011

Beautiful Photographs Of Lake

A lake is a body of relatively still fresh or salt water of considerable size, localized in a basin that is surrounded by land. Lakes are inland and not part of the ocean, and are larger and deeper than ponds. Lakes can be contrasted with rivers or streams, which are usually flowing. However most lakes are fed and drained by rivers and streams.

 In this article I collected a huge list of lake photographs to inspire the fellow photographers. I hope you guys will love this collection. 

Enjoy!
Lake Photographs

Trillium Lake

Lake Photographs

Lake Nights

Lake Photographs

Autumn Lake


Saturday, May 21, 2011

The Golden Hour

Photographers call the hour after the sun rises in the morning and the hour before the sun sets in the evening “the golden hour.” These two time-slots are called the golden hour because of the warm orange glow pictures have when taken during these time periods. It’s not the only time you can take pictures outside, but many people (especially landscape photographers) would argue that it is the best.

Not only do the colors look great, but having the sun low in the sky provides good options for lighting. If the sun is to the left or right of your subject you can get some pleasing shadows that give your image depth and dimension. If the sun is behind your subject, you can get some neat back-lit effects – glowing hair included. Consider the following examples:


     by Joseph in Practical Tips

Friday, May 20, 2011

Tips for Shooting Extremely Wide Angles

Wide angle photography can be fun and challenging at the same time. On one hand, it’s great to pull in so much of a scene with a single shot. On the other hand, it can be difficult to produce a well composed photo at such a wide perspective. So I’ve pulled together a few photos and pieces of advice for shooting with wide angle lenses. 

1. EMPHASIZE THE FOREGROUND
Get low or point the camera down to make your foreground the main subject. Since objects in the foreground are much closer than the background, they will appear quite large in comparison. As you get closer to your subject, this emphasis becomes stronger.
The Shell, by Garry
Photo by Garry

Thursday, May 19, 2011

Amazing Examples of Weather Photography

Weather is the state of the atmosphere, to the degree that it is hot or cold, wet or dry, calm or stormy, clear or cloudy. Most weather phenomena occur in the troposphere, just below the stratosphere.

Weather refers, generally, to day-to-day temperature and precipitation activity, where as climate is the term for the average atmospheric conditions over longer periods of time. When used without qualification, “weather” is understood to be the weather of Earth. In this post I collected some of the examples of weather photography for the inspiration of our readers.


Examples of Weather Photography
Thunder


Examples of Weather Photography
Winter


Examples of Weather Photography
Sweet Sunrise


Beautifully Shot Macro Photographs

This post features the 5 beautifully shot macro photographs. I collected from the Internet.

The secret to successful macro photography is eliminating the variables.

Here's a checklist of things that can get in the way of your capturing your macro subject clearly and accurately, and how to get rid of them so you can get down to the business of turning the mundane into the extraordinary

So lets get inspired from these beautifully shot Macro Photographs and click more beautiful photographs like these so that I can create another showcase like this.


Beautifully Shot Macro Photographs
Australian Skybury
 

Beautifully Shot Macro Photographs
Unschuld

Beautifully Shot Macro Photographs
Strawberry in Milk

Beautifully Shot Macro Photographs
Let The Sun Shine

Beautifully Shot Macro Photographs
On My Way Home


Try Lowering Your Camera Angle

Copyright Scott Bourne 2010 - All Rights Reserved

Simple tip today: Try moving the camera height to get a different look with your photography.Whether I am photographing birds or babies, I often find that a low camera angle can have a stunning impact on the resulting image.

Especially when photographing animals, eye-level shots are more exciting. There are other benefits. I was able to eliminate distractions in both the foreground and background by using this angle. A low angle is helpful for separating the subject from the background.

You don’t need to make every shot at five feet, six inches. Get low and see what happens.

Wednesday, May 18, 2011

Canon Voted Europe’s Most Trusted Camera Brand

Canon has once again been voted Europe’s ‘most trusted’ camera brand by readers of Reader’s Digest. The Reader’s Digest Most Trusted Brands Survey is an annual pan-European survey of consumer attitudes to brand products and services. Canon came out on top in 13 of the 16 countries surveyed. This is the eleventh consecutive year that Canon has been voted as Europe’s top camera brand. 

Canon’s Press Release
Canon is Europe’s ‘most trusted’ camera brand
United Kingdom, Republic of Ireland, May 17 2011 – Canon, world-leader in imaging solutions, has been voted as the top Camera Brand in the Reader’s Digest Most Trusted Brands Survey 2011, an annual pan-European survey of consumer attitudes to brand products and services. Reader’s Digest asked its readers across 16 European countries to nominate the brand they trusted most in a range of consumer categories, including cameras.

"Life-Lapses"

The world is filled with sluggish spectacles. Watching them would be painful were it not for time-lapse photography, which can make those long stories short and remarkably entertaining.

One of the most amazing Time-lapses I've ever seen, with a good music.


from Mike Flores on Vimeo.

When a phenomenon happens very slowly, viewing accelerated footage helps scientists take a step back and see the big picture: At higher speeds, things that we regard as fixed take motion — even the dullest scenes spring to life.


from TSO Photography on Vimeo.